

Velg deltype
Velg ønsket deltype for å se forhåndsvist tegning av tekniske dimensjoner
Bracket Material
Material
Bushing Material
Carrying Capacity
Diameter
Plunger Diameter
Type Of Assembly
Type Of Tube
Diameter Bases
Connecting Thread
External Diameter
Handle
Hole
Lever Length
Wheel Base
Threaded Screw
Hole Distance
Threaded Connection
Type Of Bellow
Type Of Vacuum Cups Holder
Vacuum Cup Holders Dimension
Vacuum Cups Dimension
Connector
Main specifications
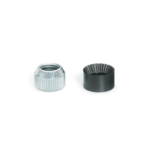
Nut
Zinc-plated steel.
Packing ring
NBR synthetic rubber.
General information
Features
The FM kit (fast mounting kit) has been designed for mounting level indicators series HCX. from the outside when nuts cannot be fitted from the inside of the reservoir.
Instructions of use
Assembly of the indicator with the FM Kit (fast mounting kit)
- Arrange the holes d1 as reported in the table and make sure that the holes in the plate do not have any burs, especially inside the reservoir.
- Unscrew the nuts from the HCX. indicator and take out the washers supplied with the standard execution, put the packing ring inside and screw the nuts (with or without O-Ring according to the thickness h1).
- Before assembly of the indicator on the reservoir, slightly tighten the nut by hand against the packing ring.
We advise you, then, to deform slightly the threaded end of the screw in order to prevent the nut from falling into the reservoir while disassembling the indicator.
- To disassemble the indicator from the reservoir, just rotate the screw 3/4 of a turn keeping the plastic part of the indicator under tension (pulling).